When I bought my SB 10K earlier this year, the 6" 4-Jaw chuck that was included in the deal had a backplate that was for a different lathe. The chuck was a bit rusty and dinged-up, but still seemed to be solid and tight. The goal of this project was to make the chuck usable for this lathe.

Here's the Logan 6" 4 jaw chuck disassembled.
A threaded lathe backplate was purchased from tools4cheap. The hub of the backplate was wider and much longer than needed. You could only get a few spindle threads to engage, so the hub should be turned down. You could thread the backplate on the spindle "backwards" to do this, but then the backplate bottoms-out on the threads instead of referencing against the spindle.
To get around this, an arbor spacer was purchased to fit around the spindle threads.

These are ground flat and this one was thick enough so that the chuck will reference against the spacer and therefore the spindle. The arbor spacer had to be chamfered a bit on the inside to fit correctly.

In the first picture you can see the arbor spacer in place as the work is started on the hub. The hub diameter was reduced and then in the second picture the hub length was cut back. The other lathe chuck and a dog plate were used as a reference for a target size of the hub. Once the hub was completed, the arbor spacer was removed and the backplate was installed facing in the normal direction. The backplate diameter was reduced to match the chuck and then the flange thickness was reduced to suit the mounting bolts, with the inside left for the registration boss.
That cast iron is really messy stuff with nasty, abrasive dust and I ended-up tearing the lathe down to proper clean it. Next time I'll try to do a better job of capturing the dust with rags or more vacuuming as I'm working.

Now it was time to see if my careful measurements payed off. If the chuck fits, just a little bit of chamfering and a finish cut on the face would finish the lathe work. If it's wrong, it's time to cry. :scared:

Success! I was very happy with the fit.
By the way, that's a Shars dial indicator with a smooth magnetic back. They fit well on these lathes and it gets used frequently. In this instance, the dial indicator will be used to easily return the carriage back to zero for the last facing cut.

Now that the lathe work was completed, the holes need to be transfered to the backing plate to be drilled and tapped.

Next the holes were located, drilled with a pilot bit, then the tap size bit and finally tapped with the aid of a spring-loaded tap follower.
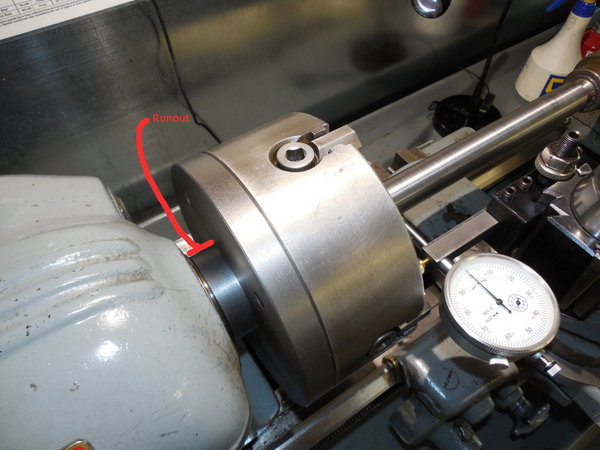
And here's the chuck installed on the backplate. The only fly-in-the-ointment is a bit of run-out at the hub as noted in the picture. When the backplate is screwed on backwards as shown earlier the run-out disappears, but then the back-plate flange and registration boss have run-out. I think what is happening is that the backplate follows the spindle threads in a slightly cork-screw fashion as it's installed. Since the backplate isn't "parked" at the same spot on the threads when it's registered to the spindle while using the arbor spacer, you get run-out on any surface that is machined at that time. Note that any of the parallel surfaces to the spindle registration face are fine so it's not that the spacer isn't flat.
It's a purely cosmetic problem as all the other surfaces run true. If I really wanted to fix it I could mount the backplate on a faceplate and indicate off the flange or registration boss edge and then cut the hub true, but I'm not going to bother.
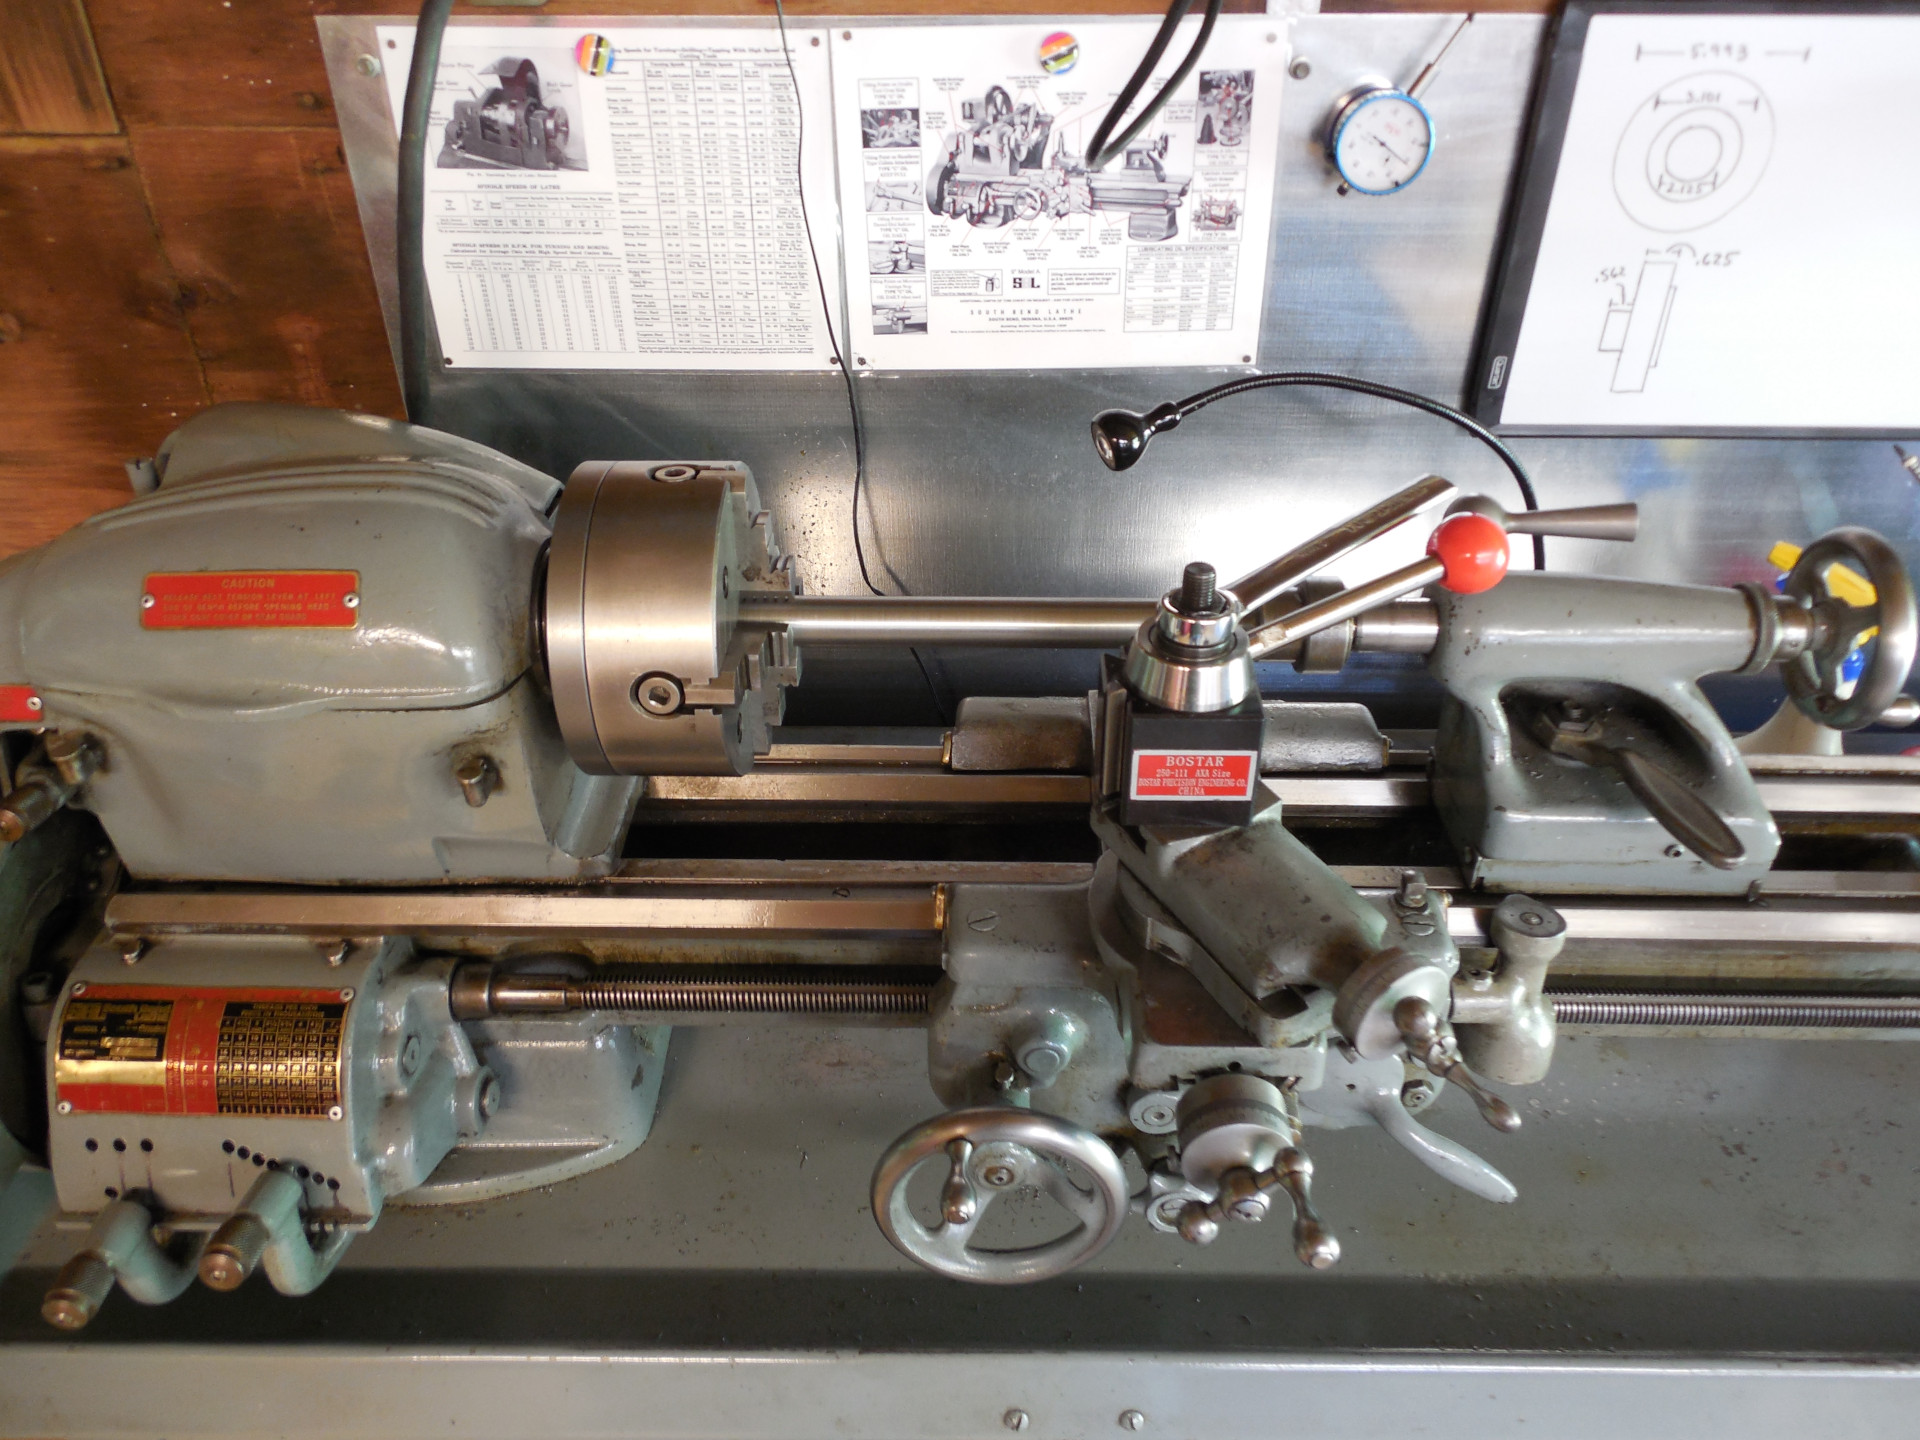
And the chuck is installed on the lathe. It cleaned-up nicely and it's a nice to have a 4 jaw, especially after watching all those Abom79 videos on Youtube.